Thursday, May 15, 2008

Pear Bran Muffins


At the deli/coffee shop that I work part-time at, I sometimes make the batter for the homemade Raisin Bran Muffins and bake them for sale at our store.  I finally had a chance to bake some at home, but I changed the recipe around a little bit.  In the store, we don't use applesauce or yogurt in the batter to moisten the muffins and we use raisins instead of fresh fruit.  I love these muffins because they are hearty and a bit chewey.  Here is my version of healthy, low-fat bran muffins:

Pear Bran Muffins

1 1/4 cups whole wheat flour
3 teaspoons baking powder (you need all the fluffiness you can get because of the heavy wheat flour)
1/8 cup white granulated sugar
1/8 cup light brown sugar, packed
1 1/2 cups bran cereal (I use Original All-Bran)
1 1/4 cups low-fat milk (I used soy milk and they came out just fine)
2 egg whites
1/4 cup vegetable oil
2 tablespoons applesauce or low-fat yogurt
1 Bosc pear, peeled and chopped into little pieces (apples also work really well in this recipe)

Preheat oven to 400 degrees.

Mix the flour, baking powder and sugars in a bowl. Set aside.

Mix the dry cereal and the milk together in a bowl.  Let the cereal-milk mixture stand for about 2 minutes, or until the cereal is soft.  Add the egg whites and the oil to the cereal. Mix well. Add the applesauce and pear chunks and incorporate.

Add the dry ingredients to the cereal mixture and mix only until just combined! Do not over mix.  Pour the batter into a greased, 12 tin muffin pan evenly. Don't use paper muffin cups because the muffin batter sticks to the paper much more than regular cupcakes do (I learned this myself when making these for the first time at home). 

Bake for 25 minutes (about). Enjoy fresh out of the oven!

Now here is a trick that I learned from my cousin Sarah (check out her blog too!). I froze the muffins after they had cooled completely and took one out every morning before class as my breakfast.  All you need to do is microwave each muffin for about 35 seconds until the inside and fruit pieces are warm.  The muffins are really nutty tasting because of the wheat flour and are a really healthy start to your day!

Wednesday, May 14, 2008

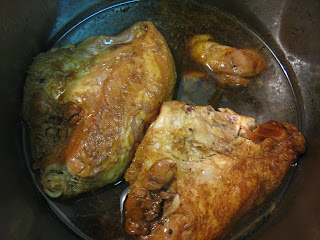
Adobo Chicken


Since the school year is coming to an end... I have had no time to post! 

When I went home for Passover, my Filipino nanny from when I was a baby came to visit.  She shared with me her recipe for Adobo Chicken, which she always served with Basmati rice.

Adobo Chicken

1 whole chicken with bones, cut into eighths
5 garlic cloves, whole but smashed
Olive oil
1 tsp ground black pepper
2 dried bay leaves
1 cup soy sauce
1 cup white vinegar
1 whole lemon (cut into 4 pieces)

Rub the lemon and salt into the chicken before sauteing.

Heat enough olive oil to coat the bottom of a large pasta pot (medium temp).  Add all the garlic and cook it until it is lightly browned.  Add the chicken pieces and saute until they are brown on all sides (about 3 minutes per side).  You might have to cook the chicken in batches if all the pieces don't fit in the pan at once.  Place all the chicken pieces in the pot, add the black pepper, bay leaves, soy sauce and vinegar.  Mix everything as well as you can with a large wooden spoon.  Let the chicken in the sauce come up to a boil, then simmer on a lower heat for 25-35 minutes or until the chicken is fully cooked inside.  Add more vinegar or soy sauce until it suits your taste (the sauce should be a bit tangy).

Take the chicken out of the pot with tongs and serve with Basmati rice.  Drizzle some of the cooking liquid over the chicken and rice.  


Monday, March 31, 2008

Rugelach with Apricot Preserves

Over Spring Break I did a lot of baking and cooking and one of the recipes I tired was homemade rugelach. I was watching the Foodnetwork and Ina Garten made these very delicious-looking rugelach cookies. Rugelach in general is very similar to mandle bread  (recipe posted below). The dough is very rich because it is made with cream cheese and the nuts and jelly really spice it up. It was fun to roll out the dough and cut it into triangles in order to roll them up into the traditional shape of rugelach. My whole family loved them and all the cookies were gone in 3 days.

Rugelach with Apricot Preserves

8 ounces cream cheese, at room temp
1/2 pound unsalted butter, at room temp
1/4 cup granulated sugar plus 9 tablespoons
1/4 teaspoon kosher salt
1 teaspoon pure vanilla extract
2 cups all-purpose flour
1/4 cup light brown sugar, packed
1 1/2 teaspoons ground cinnamon
3/4 cup raisins
1 cup walnuts, finely chopped
1/2 cup apricot preserves, pureed in a food processor
1 egg beaten with 1 tablespoon milk, for egg wash

Cream the cheese and butter in the bowl of an electric mixer fitted with the paddle attachment until light and airy. Add 1/4 cup granulates su
gar, salt, and vanilla. With the mixer on low speed, add the flour and mix until just combined. Dump the dough out onto a well-floured board and roll it into a ball. Cut the ball in quarters, wrap each piece in plastic and refrigerate for 1 hour.
To make the filling, combine 6 tablespoons of granulated sugar, the brown sugar, 1/2 teaspoon cinnamon, raisins and walnuts.

On a well-floured board, roll each ball of dough into a 9 inch circle. Spread the dough with 2 tablespoons apricot preserves and sprinkle with 1/2 cup of the filling. Press the filli
ng lightly into the dough with the rolling pin. Cut the circle into 12 equal wedges- cutting the whole circle into quarters, then each quarter into thirds. Starting with the wide edge, roll up each wedge. Place the cookies, points tucked under, on a baking sheet lined with parchment paper. Chill for 30 minutes.

Preheat over to 350 degrees.

Brush each cookie with the egg wash. Combine 3 tablespoons granulated sugar with 1 teaspoon cinnamon and sprinkle on the cookies. Bake for 15 to 20 minutes, until lightly browned. Remove to a wire rack and let cool.


Friday, March 28, 2008

Noodle Kugel


One of my favorite homemade jewish foods is noodle kugel. After eating and trying many different noodle kugels over the years from family members and friends, I finally made my own this week. I started with a traditional recipe that my mom gave me and changed a few things, such as using light brown sugar instead of all white sugar. Also, I don't like the taste of raisins in this dish so I left them out.

Noodle Kugel

10 oz extra wide egg noodles
4 eggs
24 oz container 4% milkfat cottage cheese (I used small curd)
1/4 to 1/2 cup granulated white sugar (depends on how sweet you want it)
1/2 cup light brown sugar
1 stick unsalted sweet cream butter, softened at room temp
2 teaspoons vanilla
1 tablespoon cinnamon
pinch of salt

Preheat oven to 350 degrees.

Boil a pot of unsalted water. Cook the noodles until still slightly crunchy, about 4 to 6 minutes. Drain pasta.

While the noodles are boiling, combine the cottage cheese, sugars, butter, vanilla, cinnamon and salt in a large bowl. Add the drained noodles to the cheese mixture and mix until the noodles are evenly coated. Pour into a greased 9 by 13 inch glass baking dish. Cover the entire dish with aluminum foil and bake for 1 hour covered. Remove the foil and bake for another 30 minutes until the top noodles are a light brown color and crunchy.

Thursday, March 27, 2008

Tuna Salad with Pears, Golden Raisins and Pecans

I work part time at a gourmet deli and coffee shop. It is a family business run by a brother and sister. The tuna salad that we make in-store and sell is a family recipe passed down through the generations. I tried to recreate the salad as best as possible to the salad we make in the deli. The tuna salad sandwich is our number one seller!

Tuna Salad with Pears and Golden Raisins

18 oz. white albacore tuna fish packed in water
about 1/4 cup light mayonnaise (add more or less depending on how m
uch mayo you like)
1/4 cup golden raisins
1/4 cup finely chopped pecans
1/4 cup fancy shredded cheddar cheese
1 medium sized bartlett or anjou pear- chopped into small pieces
2 stalks celery- chopped into small pieces
1/2 a medium red onion- diced into small pieces
1 tablespoon lemon or lime juice
salt and pepper to taste


First drain the tuna fish and add it to a large bowl. Add the mayo a
nd mix until well incorporated, breaking up the big chunks of tuna at the same time. Add the raisins, pecans, cheese, pear, celery, onion, citrus juice and salt and pepper. Mix all ingredients together!

Serve with toasted bread or as a sandwich. 


Tuesday, March 25, 2008

Easter Cupcakes

I made yellow Easter cupcakes for my Aunt's Easter lunch on sunday. I dyed vanilla frosting yellow and decorated the cupcakes with pastel flower sprinkles and spray coloring over stencils to make cute designs. The cupcake stand I purchased from Crate and Barrel, which is really cute and surprisingly sturdy. I used the same recipe posted below for the cupcake batter and icing. The cupcakes were a hit with my whole family!


Nanny Patties Over Basmati Rice


My nanny while growing up was the best cook and her salmon patty recipe was one of my favorite dishes. Over the years, I have made the patties numerous times. I've tried my best to recreate this recipe from memory, and I think it is pretty identical to the original Nanny Patty.

Nanny Patties

14.75 oz can of wild alaska pink salmon (you can leave the bones and everything else because they are not hard and you won't even notice them once mixed up with the crumbs)
1/4 cup italian seasoned bread crumbs
1 clove garlic, finely chopped
1/4 of a medium onion, finely chopped
1 egg
black pepper to taste

Heat a saute pan on medium heat with 3 tablespoons olive oil. Drain the salmon but leave some liquid. Add the salmon to a medium sized bowl and brake up with a fork. Add the bread crumbs, garlic, onion egg and pepper. Mix with the fork until the crumbs are well combined. Separate the fish mixture into 5 equal portions. Using your palms and fingers, shape each portion of fish into flat patties. Place each patty carefully in p
an. Cook for about 4 minutes on the first side, then flip over with a spatula and cook them for another 4 minutes on the other side. The patties should have a brown crust on both sides. 

I made basmati rice in my rice cooker, which is what my nanny always served these salmon patties with. She also taught me to break apart the patty and mix it in with the rice and create a sort of rice-salmon dish. That is how I have been eating these delicious patties for years!

Chicken Cacciatore


This recipe is based off of Giada De Laurentiis' chicken cacciatore. The chicken was very juicy and the sauce was super yummy. I served the chicken with spaghetti and sauteed spinach with garlic.

Chicken Cacciatore

4 chicken thighs
2 chicken breasts (I used only thighs because that is all I had in the freezer)
2 teaspoons salt
1 teaspoon freshly ground black pepper
1/2 cup all purpose flour, for dredging
3 tablespoons olive oil
1 large red bell pepper, chopped
1 onion, chopped
3 cloves garlic, finely chopped
3/4 cup dry white wine
1 28 ounce can diced tomatoes with juice
3/4 cup reduced sodium chicken broth
3 tablespoons capers (I left them out)
1 1/2 teaspoons dried oregano leaves
1/4 cup coarsely chopped fresh basil leaves

Mix the salt, pepper and flour together on a plate. Dredge the chicken pieces in the flour to coat lightly.

In a large heavy saute pan, the the olive oil over medium-high flame. Add the chicken pieces to the pan and saute until golden brown, about 5 minutes per side. If all the chicken does not fit in the pan, saute it in 2 batches. Transfer the chicken to a plate and set aside. Add the bell pepper, onion and garlic to the same pan and saute over medium heat until the onion is tender, about 7 minutes. Season with salt and pepper. Add the wine and simmer until just reduced by half, about 3 minutes. Add the tomatoes with thier juice, broth, capers and oregano. Return the chicken pieces to the pan and turn them to coat in the sauce. Bring the sauce to a simmer. Continue simmering over medium-low heat until the chicken is just cooked through, about 30 minutes for the breast pieces and 20 minutes for the thighs (after 30 minutes, my chicken thighs was still raw in the middle so make sure you cut into the chicken and check it before you serve it). 

Using tongs, transfer the chicken to a platter. If necessary, boil the sauce until it thickens slightly, about 3 minutes. Spoon the sauce over the chicken, then sprinkle with the fresh basil and serve!

Sunday, March 2, 2008

Spinach and Ricotta Ravioli with Tomato Sauce

I decided to forget posting only baking recipes  because I don't have as much time to bake at school (not to mention that my Cuisinart stand mixer stays at my parents house because it is too heavy to bring back and forth to school).  Since I cook almost every night for my boyfriend and frequently for my roommate and my boyfriends friends, I have plenty of non-baking recipes to share!  So here is the first cooking post.  I made it tonight and it came out exactly how I imagined it in my head.  Enjoy!

Spinach and Ricotta Ravioli

1 package wonton wraps
1 egg beaten

For the filling:
1 15-ounce container park-skim ricotta cheese
8 ounces fresh mozzarella, shredded
1/4 to 1/2 cup freshly grated Parmesan cheese
1 cup fresh baby spinach, chopped into very small pieces
1 large egg
salt and pepper to taste

Separate the wonton wraps (they come in stacks) and lay each wrap flat on a large cutting board.  

To make the filling, combine the ricotta, mozzarella and Parmesan in a medium bowl.  Add the chopped spinach and stir to combine.  Add the egg, salt and pepper and incorporate well.  Drop a heaping teaspoon of cheese and egg mixture on the middle of each wonton wrap. Take the beaten egg (acting as glue) and dip a pastry brush or your finger in it and trace the outside of the wonton wrapper with the brush (or finger).  Once all the sides have a light brushing of egg, take one corner of the dough and fold it over to the opposing corner.  Press the sides of the wrapper together, making sure there are no holes for the cheese stuffing to escape through.  The finished ravioli should have the shape of a triangle.  Salt a boiling pot of water with a palm-full  of Kosher salt and place only about 6 or 7 raviolis in the pot at one time.  Cook for about 4 minutes.  Remove the raviolis with a slated spoon and place on a plate with a little bit of olive oil so they do not stick together.  Cook all the raviolis in batches until you are done!

Monday, February 18, 2008

Mini-Heart Cheesecake

For Valentine's Day, I bought a mini spring-form pan in the shape of a heart to make a cheesecake for my boyfriend. I found an Italian cheesecake recipe on Foodnetwork.com and changed a few things.


Mini-Heart Cheesecake Recipe

2 ounces graham crackers (finely ground in a food processor)
1 1/2 tablespoons unsalted butter, melted

3 oz fresh whole milk ricotta cheese
4 oz regular cream cheese, room temp
1/4 cup sugar (or a little less)
1 tablespoon clover honey
1 teaspoon orange zest
1 whole egg

Preheat the oven to 350 degrees.

Wrap the mini heart shaped spring-form pan in 2 layers of foil, making sure that the foil comes far above the top of the pan (this ensure that no water enters the pan when baking). Finely grind the crackers in a food processor.  Add the melted butter and process until the crumbs are moistened.  Press the crumb mixture over the bottom of the pan (not the sides). Bake until the crush is golden, about 10 minutes.  Cool the crust comp
letely.

Blend the ricotta cheese in a clean food processor until smooth.  Add the cream cheese and sugar, blend well.  Add the honey and orange zest, blend again.  Add the egg and pulse until just blended.

Pour the cheese mixture over the crust in the pan.  Place the pan in a roasting dish.  Pour enough hot water into the roasting dish to come halfway up the sides of the heart pan.  Bake until the cheesecake is golden and the center of the cake m
oves slightly when the pan is gently shaken, about 40-50 minutes.

Transfer the cake to a rack and cool for 1 hour.  Refrigerate until the cheesecake is cold, at least 6 hours and up to 2 days.  Serve with strawberries.

Thursday, January 17, 2008

Apple Zeppole with Cinnamon Honey


I recently watched an episode of Everyday Italian and Giada made these Italian apple donuts that looked amazing. And since I never make fried desserts, I decided to try making these donuts. The original recipe calls for cinnamon whipped cream to dunk the donuts in, but I opted for a honey cinnamon glaze which changed the recipe into an Italian-Greek dessert. I also included the directions to make the whipped cream.

Apple Zeppole with Cinnamon Honey

For the batter:
1 large apple, peeled and grated (about 1 1/2 cups)
1/4 cup sugar
1 stick unsalted sweet butter
1/4 teaspoon salt
1/2 cup water
1 cup flour
4 eggs
olive oil for frying

For the cinnamon honey:
1/4 cup honey, warmed in the microwave
1 teaspoon cinnamon

For the cinnamon whipped cream:
1 cup whipping cream, cold
2 tablespoons confectioners' sugar
1 teaspoon cinnamon

In medium saucepan combine the butter, salt, sugar and water over medium heat. Bring to a boil. Take pan off the heat and stir in the flour. Return to the pan to medium heat and stir continuously until mixture forms a ball, about 3 minutes. Transfer the flour mixture to a medium bowl. Using an electric mixer on low speed, add eggs one at a time, incorporating each egg completely before adding the next. Beat until smooth. Add the grated apple and stir to combine. 

Pour enough oil into a large frying pan to reach a depth of 2 inches. Heat oil over medium heat until a a thermometer reaches 325 degrees. I just tested the oil by dropping a small amount of dough into the oil. If the dough immediately started bubbling, then the oil was ready.

Using a small ice cream scooper or 2 small spoons, carefully drop about a rounded tablespoon of dough into the hot oil. Turn the zeppole once or twice and cook until golden brown and puffed up, about 4 minutes. Fry the zeppole in batches. Drain on paper towels.

If using the honey glaze, mix the cinnamon and warmed honey together in a large bowl. Add the hot donuts once drained to the mixture and mix with a large spoon so each donut is covered in honey. 

If using the whipped cream, combine the whipping cream, 2 tablespoons confectioners' sugar and cinnamon in a medium bowl. Whip until medium soft peaks form. Transfer the whipping cream to a serving dish. Place donuts on a plate and sprinkle with confectioners' sugar and serve with the whipped cream on the side.

Wednesday, January 9, 2008

Vanilla Buttercream Frosting


1 cup (2 sticks) unsalted butter, very soft
8 cups confectioners' sugar
1/2 cup milk (I used whole milk)
2 teaspoons vanilla extract

Place butter in a large mixing bowl. Add 4 cups of the sugar and then the milk and vanilla. Beat until smooth and creamy. Gradually add the remaining sugar, 1 cup at a time, until icing is thick (you may not need to use all of the sugar). If desired, add a few drops of food coloring and mix well. I used blue food coloring to make a teal colored frosting.

Enough icing to frost 2 dozen cupcakes.

Vanilla Cupcakes


This recipe comes from the Buttercup Bake Shop Cookbook that I purchased in NYC this past Christmas. It's basically the same recipe that Magnolia's Bakery uses, and let me tell you, the ones I made taste exactly the same as the ones I tried at Magnolia's. Yumm. And the recipe for the batter is identical to the yellow cake recipe in a past post, you just pour the batter into cupcake pans instead of a cake pan. The cake batter makes 2 dozen cupcakes.

Directions for cupcakes:

Line two 12-cup muffin tins with cupcake papers. Spoon the batter into the cups about three-quarters full. Bake until the top springs back when lightly touched, about 20 to 22 minutes. Remove cupcakes from tin and cool completely on a wire rack before icing.

I used vanilla buttercream frosting for half the cupcakes and chocolate buttercream frosting for the other half (cut each recipe in half). Both icings were supper yummy.

Tuesday, January 8, 2008

Traditional Apple Pie


This pie is perfect to make during Winter.

Traditional Apple Pie

For the filling:
6 apples (Granny Smith apples work well), peeled and sliced
2/3 cup sugar
1/4 teaspoon salt
2 tablespoons flour
1 teaspoon cinnamon
1/2 teaspoon nutmeg

Combine all filling ingredients together in a bowl and set aside. Use the same pie crust recipe from the "Mixed Berry Pie" post and the same baking directions.

Aunt Diane's Mandle Broit

This recipe has been passed down through my mom's side of the family. It started with my great aunt Diane (probably from her mother), was passed down to my mom and now to me. This is probably one of the first desserts I learned to make while growing up. This recipe is a traditional mandle broit (bread) recipe with jelly, nuts and cinnamon in the middle. The cookies themselves are something you shouldn't feel guilty about eating because the dough is made with oil!

Aunt Diane's Mandle Broit

2 eggs
1/2 cup oil
1/2 cup sugar
2-2 1/4 cup flour
1 heaping teaspoon baking powder
1 teaspoon vanilla
cinnamon
jelly (I always use apricot preserves)
chopped walnuts

Preheat oven to 350 degrees. Lightly grease a baking sheet.

Beat eggs in a large bowl (a mixer is not required). Add the sugar, oil, flour, baking powder and vanilla to the eggs and mix until a smooth dough forms. It should be firm and not stick to your hands. If the dough is sticky, add a little more flour. Divide the dough in half and use your hands to shape the dough into balls (this makes it easier to form into logs on the baking sheet). Shape each ball into a log that extends the length of the sheet using your fingertips. Now flatten each log by using your palms to a width of about 3 to 4 inches. Add as much jelly as you like, evenly spreading it on the flatten dough (make sure to concentrate the jelly in the middle and do not spread it out to the edges). Add the chopped nuts. What I normally do is make one log with nuts and one without for those in my family who do not like nuts. The last ingredient is cinnamon; sprinkle it over the jelly and nuts. Now the logs must be reformed by pulling up the sides of the dough so that they meet in the middle. Pinch both sides of the dough closed so no holes are visible or else the jelly will bubble out them during baking. Once both logs are formed, sprinkle the tops with more cinnamon and bake for 30 minutes. Remove the baking sheet from the oven and let the logs cool for 15 minutes. Slice the logs into good sized cookies, about 1 inch in width. Flip the cookies onto one side, so the jelly middle is facing up and sprinkle with even more cinnamon. Bake for another 5-10 minutes until desired crunchiness.

Sunday, January 6, 2008

Sour Cream Drizzle Cake


I baked this cake for my mom to take to a friend's house for brunch. It came out really moist because of the sour cream and the brown sugar and pecan drizzle added an extra sweetness.


Sour Cream Drizzle Cake

For the drizzle:
4 tablespoons butter- softened

2/3 cup chopped pecans
2/3 cup dark brown sugar

For the cake batter:
1 teaspoon vanilla

3/4 cup sugar
1/2 cup oil
3 large eggs, at room temp.
2 cups all-purpose flour
1 teaspoon baking powder
1 teaspoon baking soda
1/4 teaspoon salt

1 cup sour cream

Preheat the oven to 350 degrees. Grease a bunt pan with "Pam for Baking."

First, mix the butter, chopped pecans, and brown sugar in a small bowl until crumbly and set aside. Beat the sugar, oil, and va
nilla using a stand mixer. Add the eggs one at a time and beat well after each addition. In a separate bowl, combine the flour, baking powder and soda, and salt. Start by adding 1/3 of the flour mixture to the egg mixture, beat until incorporated. Then add 1/3 of the sour cream and beat. Alternate adding the flour mixture with the sour cream until all ingredients are added to the egg mixture and beat until the batter is smooth. Add about half the batter to the greased bunt pan. Then crumble half of the pecan mixture on top of the batter, evenly distributing it. Add the rest of the batter on top of the pecans to create a crunchy layer in the middle of the cake. Last, add the remaining pecans on top of the batter. Bake for 35-45 minutes or until fork inserted into the cake comes out clean.

Friday, January 4, 2008

Baking Tips: Frosting Cakes

I have made countless homemade cakes... and this is the best way to create a smooth, professional looking cake with perfect icing. First, make sure the cake is completely cooled before icing. I recommend letting layer cakes cool on wire racks because it allows the bottom of the cake to cool too. If you try cooling a hot cake on a plate or wrapped in plastic wrap, condensation forms which leads to a soggy cake. If you do not plan on icing the cake the same day that you bake it, you can cool the cakes completely and then wrap the cakes tightly in plastic wrap. Cakes can be frozen and they turn out just fine. Cakes should never be left in the refrigerator because it drys them out.

Now that the cakes are cooled, they can be iced. Take a small amount of icing and thin it down by mixing in a little water, milk, etc. For example, if the icing was made with milk, thin it with milk. For layer cakes, first frost the in between layers with the regular frosting (and assemble the layers one on top of another) and then frost the entire outside of the cake with the thinned frosting. This is called the "crumb layer." It helps to lock down all the loose crumbs and also sets and preserves the cake to ensure it does not dry out. Let the crumb coat dry for at least 20 minutes. Then, frost the entire cake with the regular icing and its done!

Mixed Berry Pie

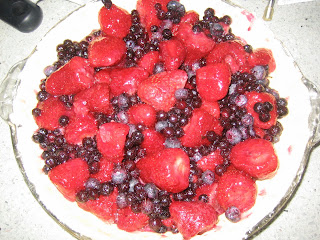
I make pies mostly in the summer when fruits such as strawberries, blueberries, and peaches are the freshest and the cheapest. Apple pies are great during winter, however frozen fruits can be used any time of year (especially in the winter). I made this berry pie with frozen strawberries and blueberries and it turned out very yummy.

Mixed Berry Pie

For the pie filling:
2 cups blueberries
2 cups strawberries (whole or cut in half)
1 cup sugar
4 tablespoons flour

1/8 teaspoon salt
2 tablespoons freshly squeezed lemon juice

For the double 9 inch pie crust:

2 1/2 cups all purpose flour
1 teaspoon salt
2 tablespoons sugar
3/4 cup (a stick and a half) unsalted butter, chilled, cut into 1/4 inch cubes
1/2 cup of all-vegetable shortening (8 Tbsp)
6-8 Tablespoons ice water

Combine the berries with the sugar, flour, salt and lemon juice. Set aside.

Directions for the pie crust:

Mix flour, salt, and sugar in a bowl. Add the butter pieces to the flour mixture. Toss to coat the butter with a little of the flour. Cut butter into the flour mixture with a pastry knife until the butter forms small pieces. Add the shortening (a tablespoonful at a time), and cut into mixture with the pastry knife.

Sprinkle 1 tablespoons of ice water over flour mixture at a time. After each addition, use a spoon and lightly toss the flour mixture until the water is incorporated. After 6 tablespoons, use your hands to gently press the crumbly dough together. If the dough does not come together easily, add more water (up to 2 tablespoons more). Make sure to not over-knead the dough! Divide the dough evenly into 2 balls and flatten each into disks. Wrap each disk in plastic wrap, and refrigerate for at least an hour to allow the dough to rest and for the chunks of butter and shortening to harden again.

After the dough has chilled, sprinkle a little flour on a flat work surface (a silicone baking sheet works well) and begin to roll-out one of the balls of dough, starting from the center and working your way out with the rolling pin (it may help to flatten the dough with your hands first). You have a big enough piece of dough when you place the pie tin or pie dish upside down on the dough and the dough extends by at least 2 inches all around.

Gently fold the dough in half and then in half again. Lift it up and place the folded point of the dough in the exact center of your pie dish. Gently unfold. Lift the edge of the dough with one hand while easing the pastry along the bottom of the dish with the other hand. Do not stretch the dough.

Add the berry mixture to the pie dish that has the crust on the bottom. Spread the berries out evenly.

Roll out the second disk of dough. Place it on-top of the berry filling and cut the dough with a knife so that it overhangs about 2 inches. Then take the top dough that is overhanging and fold it under so that is presses together with the bottom crust. Seal the crusts together at the edges. You can use the handle end of a common dinner knife to press the dough on the rim to make a pretty crust.

Another way to make the top pie crust is by using the weaving technique, which is more difficult to make than the pie crust described above. After the second ball of dough is rolled out, cut it into long strips of about 1 inch in diameter. Lay about 5 strips over the pie in the same direction as one another. Then take one strip and lay it over the 5 strips, but in the other direction. Weave the strip over and under the other ones to form a lattice top. Continue with the rest of the strips. Make sure to press the ends of the strips firmly to the bottom crust. It should look like this --->

Crack an egg and beat only the egg white as an egg wash for the top crust. Use a pastry brush to lightly paint the top of the pie with the wash. Last, use a knife to cut vents or slits into the top of the pie crust.

Bake the pie at 450 degrees for 10 minutes. Then reduce the temperature to 350 degrees and bake for another 20 to 30 minutes. If you see that the top crust is beginning to burn, you can lightly cover the entire pie or just the edges with tin foil.

Chocolate Buttercream Frosting

Perfect for cakes and cupcakes.

Chocolate Buttercream Frosting

1 cup (2 sticks) unsalted butter, very soft
1 tablespoon plus 1 teaspoon whole milk
6 ounces semisweet chocolate, melted and cooled to lukewarm
1 teaspoon vanilla extract
1 1/4 cups sifted confectioners' sugar

Beat the butter until creamy, about 3 minutes. Add the milk slowly and beat until smooth. Add the melted chocolate and beat well. Add the vanilla and beat for another 3 minutes. Gradually add the sifted sugar and beat until creamy.

This makes enough icing for 1,2 or 3 layer 9-inch cakes or 2 dozen cupcakes.

Tuesday, January 1, 2008

Yellow Layer Cake

While in New York City this past Christmas, I visited Magnolia's bakery in the Village and tried their cupcakes. They were absolutely amazing. I ended up buying a cookbook from the Butter Cup Bake Shop, which was started by one of the same original owners of Magnolia's. I just recently made the yellow layer cake for New Years and it came out really well.

Yellow Layer Cake

1 cup (2 sticks) unsalted butter, softened
2 cups sugar
4 large eggs, at room temp.
1 cup whole milk
1 teaspoon vanilla extract
1 1/2 cups self-rising flour (can be found at any grocery store)
1 1/4 cups all-purpose flour

Preheat oven to 350 degrees.
Spray "Pam for Baking" on three 9 x 2-inch round metal cake pans.
In a large bowl using a stand-up electric mixer on medium speed, cream the butter and sugar until fluffy (for about 3 minutes). Add the eggs one at a time, beating well after each addition. In a separate bowl, mix the vanilla and milk together. In another separate bowl, combine the flours. Add the flour mixture to the egg mixture in two parts, alternating with the milk mixture. Beat well after each addition. Don't forget to scrap down the sides when needed.
Divide the batter among the cake pans evenly. Bake for 20 to 30 minutes or until a toothpick or fork inserted into the middle of the cakes comes out clean. Let the cakes cool in the pans for 30 minutes before removing them. Cool the cakes completely on wire racks before icing (I recommend waiting at least 2 hours).